Keeping an updated digital portfolio is important to managing your personal brand in the internet era. When reviewing resumes, most employers will review a website link to check out the kinds of projects you have worked on. You want to have a professional website with a personalized URL that is yours alone (you don't want to be at wordpress.com/myportfolio). We'll show you how to build your website in a few hours, but first let's review what a website can do for your career.
Control Your Personal Brand
It is important that you develop a personal brand, especially in the world of architecture. There are many architects out there and you want to separate yourself from the crowd by showcasing your work and your career interests. Your brand will advertise your skills and personality to potential employers, clients, and consultants - people search the internet to find out about you before they have a chance to meet you in person. Your online persona may be the first impression you get to make.
Most professionals have LinkedIn profiles where they display their skills, but LinkedIn has its own brand and you are simply renting space. It doesn't give you much room to demonstrate creativity and it isn't the best platform for sharing your work in a portfolio format. Your own website will let you have full control over your message and the work you put so much effort into. It is yours and nobody can change it on you on a whim.
Demonstrate Your Professional Dedication
Your website is a great place to show people how much you care about the world of design and architecture. It should be more than just a simple portfolio of projects you have worked on. You have the opportunity to talk about why the projects are important to you and how you personally contributed to them. This will help you share why you are passionate about architecture and where you can contribute to projects and the profession as a whole.
A key component to your website, which will strengthen you brand, is a blog. A blog is essentially a journal where you can share your professional journey. It is a place to think critically about architecture — a place where you can explore beyond the confines of daily practice. This is where you get to share what makes you excited. It is the place where you write about your passions in architecture, whether it is sustainability, design, construction techniques, or any particular interest you have. Sharing your critical thoughts will set you apart from the crowd and will make you a better architect.
So let's get started...
How to Set Up Your Website Portfolio
Setting up a website portfolio will take a bit of time, a few hours to get the structure set if you are tech-savvy. Then you'll start to add the content over time. However you don't have to do it all at once. You'll likely want to carefully craft the text. You will have to find and edit the photos. You will probably tinker with different themes until you like the layout. Don't be overwhelmed — this should be a work in progress and will grow (and evolve), just like your career. For now, just get started.
We'll walk you through the basic steps. This article can't include every tiny detail so if you get stuck, be sure to ask your webhost for help. They will help you get unstuck.
1. Sign Up for Web Hosting
A web host is a company that provides servers to store your website and a connection to the internet so that other people can access your website. There are many levels of hosting, but for a small architectural portfolio you don't need all the bells and whistles — you just want a reliable service at a reasonable price. However, we don't suggest using a free web host because they lack reliability and you don't have the ability to own your brand or move your site when it is time to upgrade.
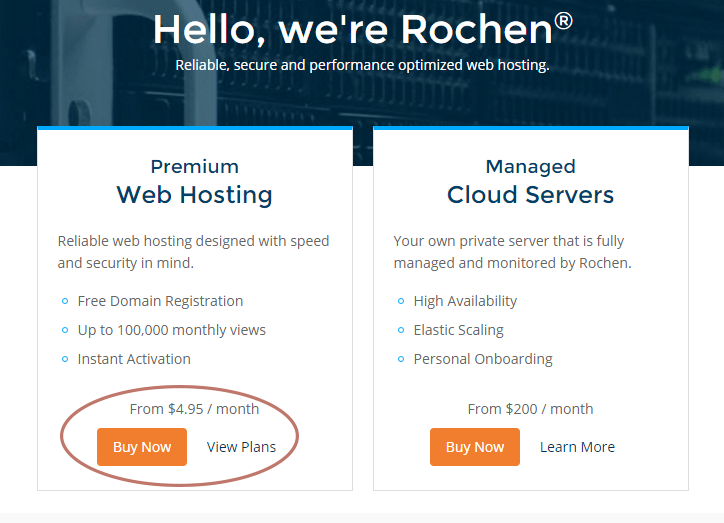
You should select the cheapest package at your chosen web host. We suggest going with the Premium Web Hosting package from Rochen, which costs $6.95 per month if you sign up for a year. If you choose to sign up for 3 years, it only costs $4.95 per month.
Beware of other web hosting suggestions out there. A lot of folks around the internet suggest other hosts (Bluehost, Host Gator) that cost as low as $3.50 per month. However, once you have been there a year, the cost jumps above the $6.95 that Rochen offers. They also have poor response times when you need support.
Click below to start setting up your website:
2. Select a Domain Name
Rochen will secure your selected domain name, which will be free for the first year. Simply enter your chosen domain name in the box and select the Register option.
Here are some tips to keep in mind when choosing your domain name:
- Select a .com if possible and .net as a backup. Other domain extensions will feel odd to many internet users.
- Keep it professional. Remember this is your portfolio.
- Using your name is best for personal branding purposes, for example, JohnSmith.com.
- If you have a common name, the FirstLast.com domain name is probably taken. If so, consider appending Architect: JohnSmithArchitect.com.
- Stay away from adding dashes or hyphens (JohnSmith-architect.com) because it is confusing when telling someone your domain name.
If you have a common name it may take a few tries to get something that works. If you are lucky enough to have your FirstLast.com available, don't ever let it go!!
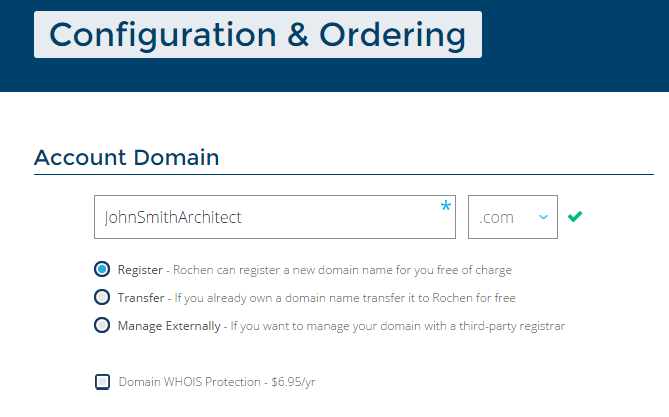
Selecting Domain Whois Protection is optional. This will keep your private information (address, phone number, etc.) secure from prying eyes when doing a search on your domain name. This is a matter of your own personal thoughts on privacy, but it is highly recommended in our age of stolen identities.
3. Install WordPress
WordPress is the most popular publishing platform on the internet. It is a content management system, which takes the data you enter about yourself and your projects and turns it into a website that people can visit. It is very easy to setup and has a ton of easy-to-use plugins to help make your site look great.
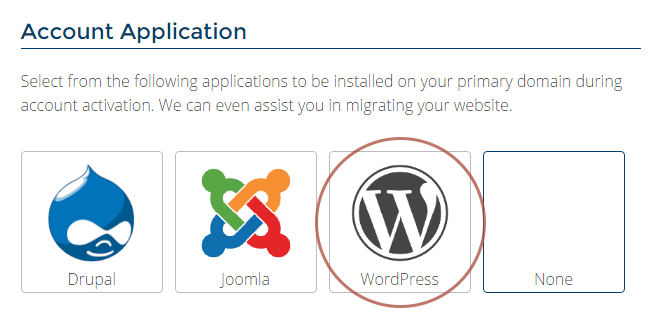
Rochen makes it easy to install WordPress. First, Click on the WordPress icon during setup:
Then select Install WordPress. You want the free install. No need to pay for migration if you are setting up a new website.

4. Select Hosting Plan
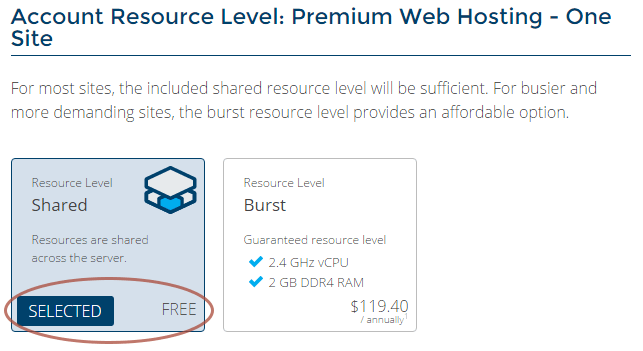
Select the Shared Resource Level, which is free. There is no need for you to have the Burst add-on because that is for websites with huge amounts of traffic, which you won't have to start. You can always add this later.
Once you've selected a hosting plan, simply fill out your personal and payment information, then click Buy & Activate Now. It will take less than an hour and you will receive all of your important login information via an email. It is important that you keep this email safe!
5. Select a Theme for Your Portfolio
While you are waiting for your log-in information to be emailed to you, you can spend some time looking for a WordPress theme to use on your new website. A WordPress theme is a plug-in that has all of the aesthetic information programmed into it so that you don't have to code your own graphics. It will make your life a lot easier if you take some time looking for a good theme. Of course, there are free themes and paid themes. Since it is pretty easy to change themes, we recommend starting with a free theme and after you've developed your site, you can upgrade to a more powerful paid theme.
There are some great free themes out there, some of which are available by searching for Portfolio in the WordPress Theme Directory.
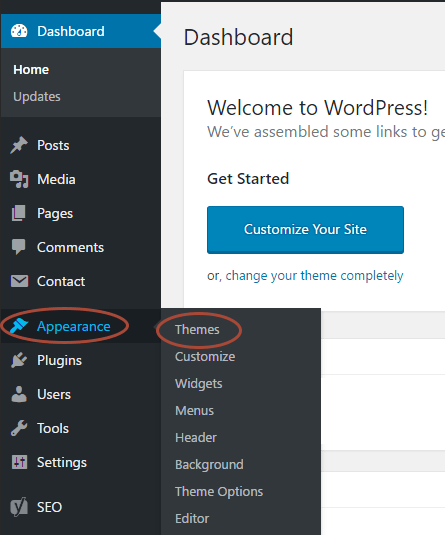
Once you've selected a theme, click with Download button and save it to your computer. Then login to your WordPress installation using the links provided in the email from Rochen. Once you are inside your WordPress installation, hover over Appearance in the left-side menu, then click Themes.
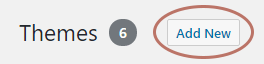
Then, at the top of the page, click Add New.
Finally, click Upload Theme and navigate to where you saved your theme download. Once the theme is installed, you can find it in the list and click Activate.

6. Create Menus for Sections
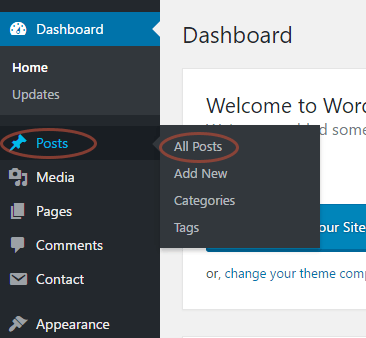
It is easy to set up categories for your website, much like you would do for a paper portfolio. From within your WordPress setup, hover over Posts in the left menu panel, then click on Categories.
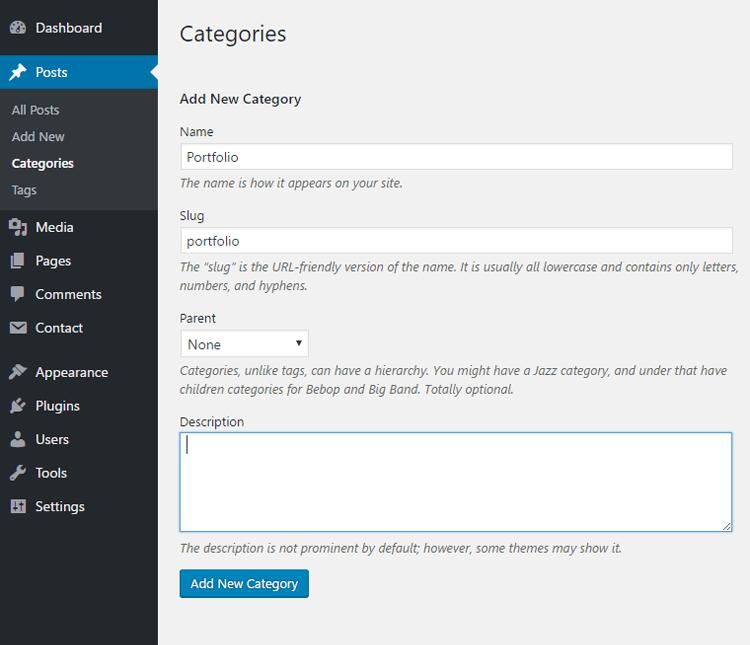
Then, fill out each field and click Add New Category. The name of your category will be used as the menu titles so it should be short, preferably a single word: Portfolio, Resume, Writing, etc. The slug should match the category and also be short — it will be used in the URL (www.JohnSmithArchitect.com/portfolio).
The Parent section should be None for top level categories. However, if you want to split your Portfolio section into sub sections (residential, educational, furniture, etc.) then you should choose a parent category, in this case you would select Portfolio.
7. Populate the Content
Admittedly, putting all of your projects and other content into the system takes the most time and is probably the hardest part because you want to tweak every word and images. After all, this is your professional storefront — it is your BRAND. However, we suggest that you immediately start dropping in the text and images that you have. Build up some momentum. The nice thing about online portfolios is that it is very easy to tweak designs, add information, or edit typos since you don't have to reprint the entire thing on expensive paper when something changes.
Let's add your first project. From your WordPress Dashboard, hover over Posts then click Add New.

Next, you can fill out all of the information for your project.
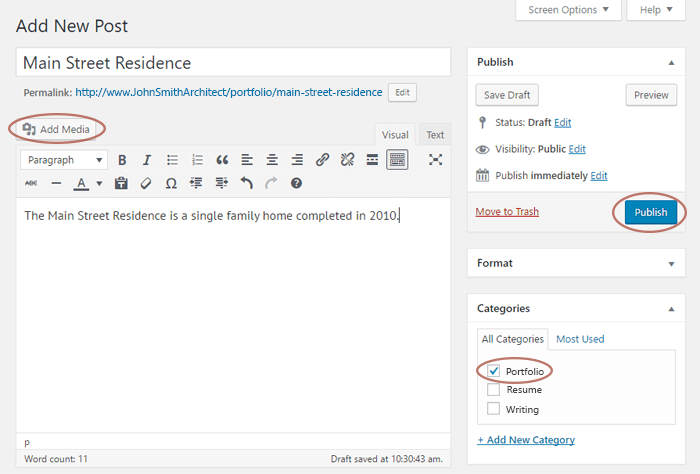
The first thing to do is look at the right column under Categories and select the proper Category for your post. In our case, we are going to add this project to the Portfolio section so we check that box.
Next, enter a description in the text box. Be sure to talk about the project, but also talk about your role in the project and how you contributed in a positive way. We suggest keeping the description short.
Finally, be sure to add multiple images by clicking the Add Media button and choosing the files. Keep in mind that you don't want to use high-resolution images on your site because the monitor can only show 72 dpi. We suggest using the File, Save for Web commend in Photoshop, which will help you downsize the image properly without losing the quality.
Congratulations! You have an Online Brand!
An online portfolio is just one component of your Brand. Be sure to add articles that show where your interests lie (architecture or otherwise). Make sure your LinkedIn profile is up to date. And continue to develop your personal network in your community.